Set up your form's welcome page
Greet customers on your form's Welcome page with a message and an optional video, and show a few of your existing testimonials as social proof.
The Welcome page is where your collection form says hello: a heading, a short message, an optional video from you and, if you like, a few of your existing testimonials, so customers see that others have already left one. The testimonials are switched on separately, with Enable Social Proof on the form's Settings tab. Anyone who can edit forms can set it up; the welcome video needs Pro, Premium and Business.
Open the Welcome page
In your project, open Forms under Collect in the sidebar and click your form. On the Pages tab, click Welcome.
The Conversational template includes a Welcome page. If your form doesn't have one, click Add Page and choose Welcome (a form can have only one). It's added just before Thank You, so drag it by its handle to where you want it.
Write the greeting
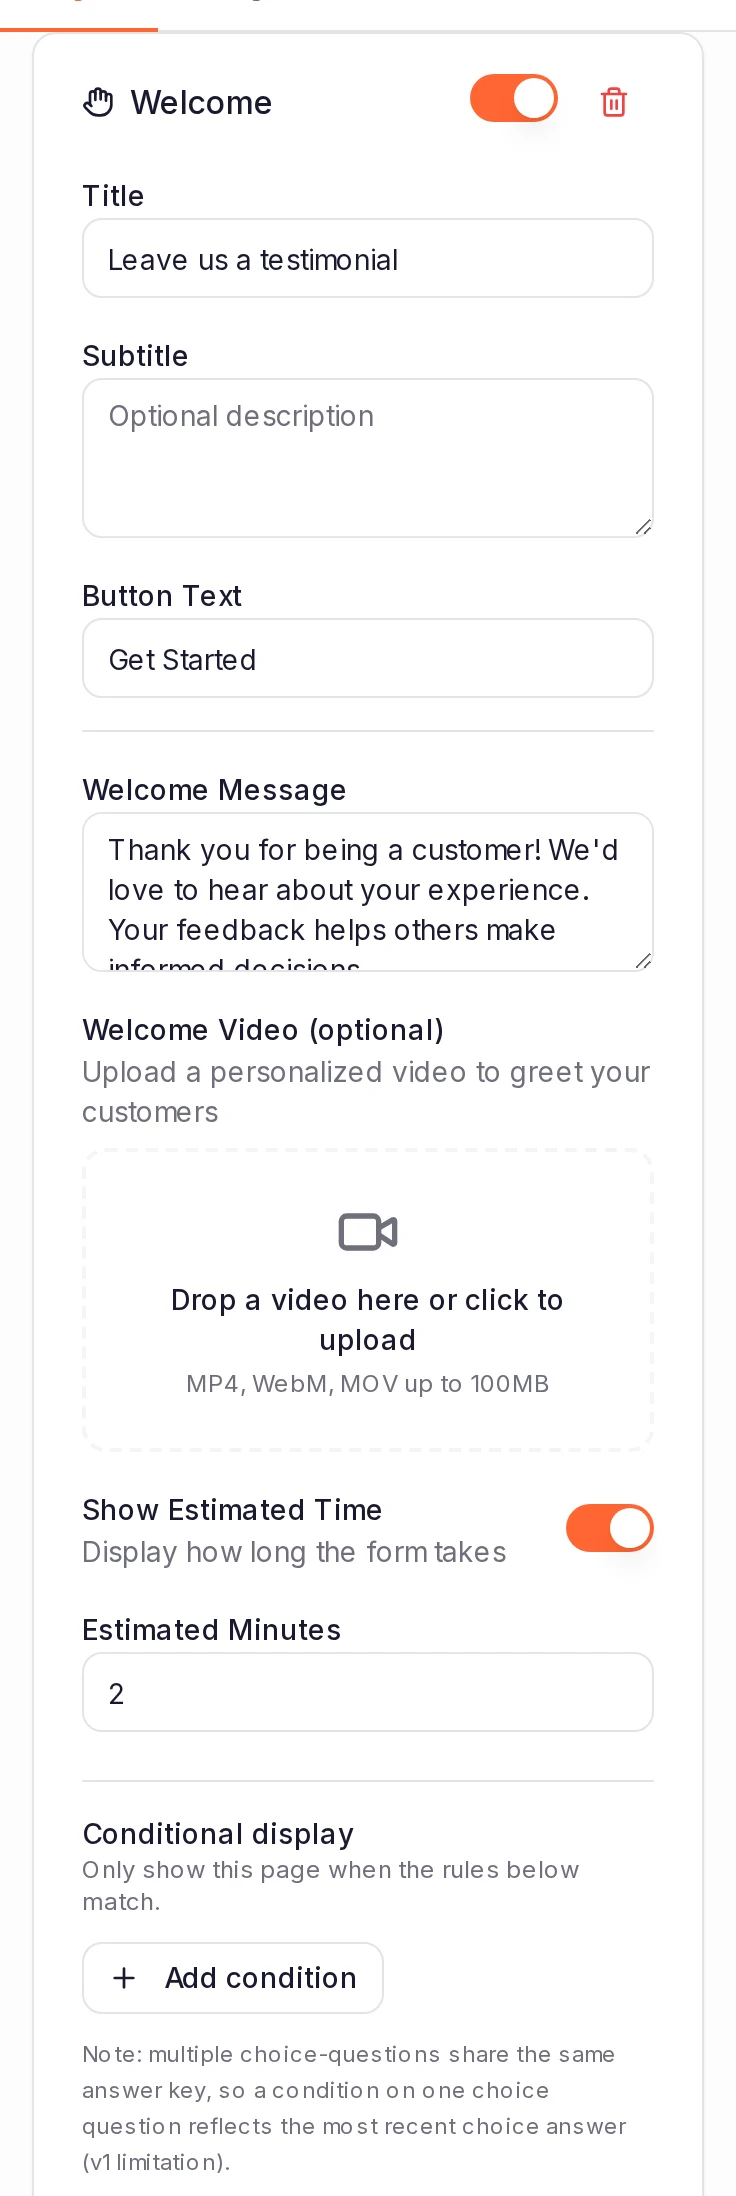
- Title: the heading at the top of the page. Left empty, it reads "Welcome!".
- Subtitle: a short line right under the title (optional). Consent and Thank You pages show their Subtitle the same way.
- Welcome Message: a short paragraph under the title.
- Button Text: the label on the button that takes customers to the next page. Left empty, it reads "Continue".
- Show Estimated Time: adds a line such as "This will take about 2 minutes". Set the number in Estimated Minutes.
Add a welcome video (optional)
Under Welcome Video (optional), drop an MP4, WebM or MOV file on the box, or click the box to choose one. When it has finished processing, it plays in the editor, with Replace Video and Remove below it.
On your form, the video sits under your message, and customers press play to watch it. On plans without welcome videos, this section shows a lock and an upgrade link instead.
Show testimonials from other customers
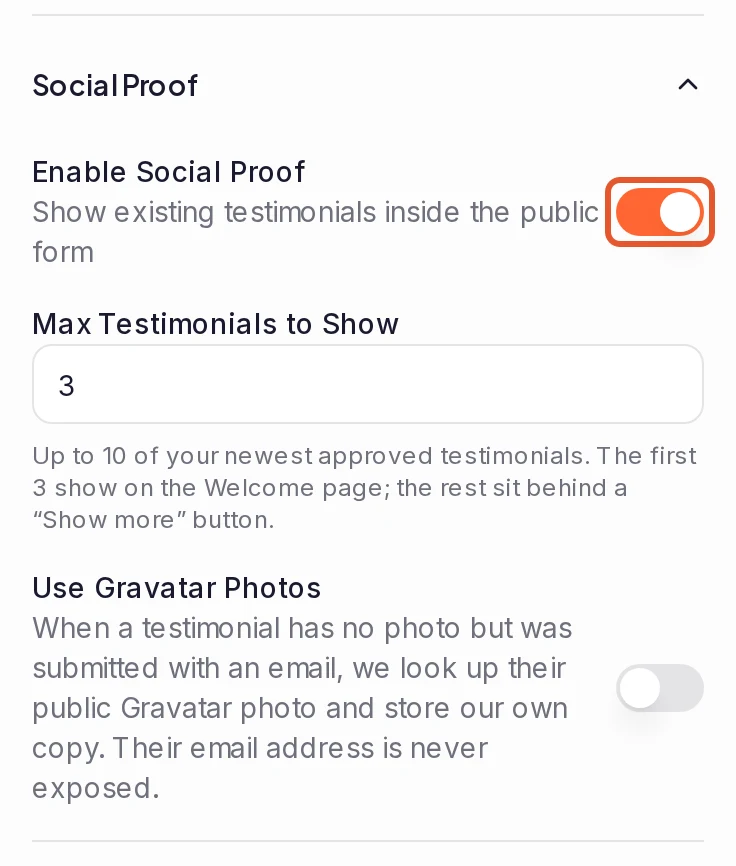
Open the Settings tab and click Social Proof to expand it. Turn on Enable Social Proof, then choose:
- Max Testimonials to Show: how many to include, from 1 to 10. It starts at 3.
- Use Gravatar Photos: for a testimonial with no photo, show the author's Gravatar photo instead of their initials. With this on, ReTestimonial looks up the author's public Gravatar photo from the email they submitted and keeps its own copy; the email address itself is never shown. The lookup runs in the background, working through the project's approved testimonials, so photos can take a few minutes to appear, or longer in a project with many testimonials. A testimonial with no email has none.
The testimonials are the newest approved ones in your whole project, whichever way they arrived. Testimonials marked as spam or archived never appear. The preview updates as you change these settings.
What customers see
Once Enable Social Proof is on (the form's Settings tab, under Social Proof), a What others are saying list appears below your message and video. It shows each testimonial with:
- the author's photo or initials, their name, and their job title and company;
- a Video or Audio badge for a video or audio testimonial, plus a small still frame for a video (it doesn't play there);
- the star rating, when the testimonial has one to show;
- the start of the testimonial text, up to two lines.
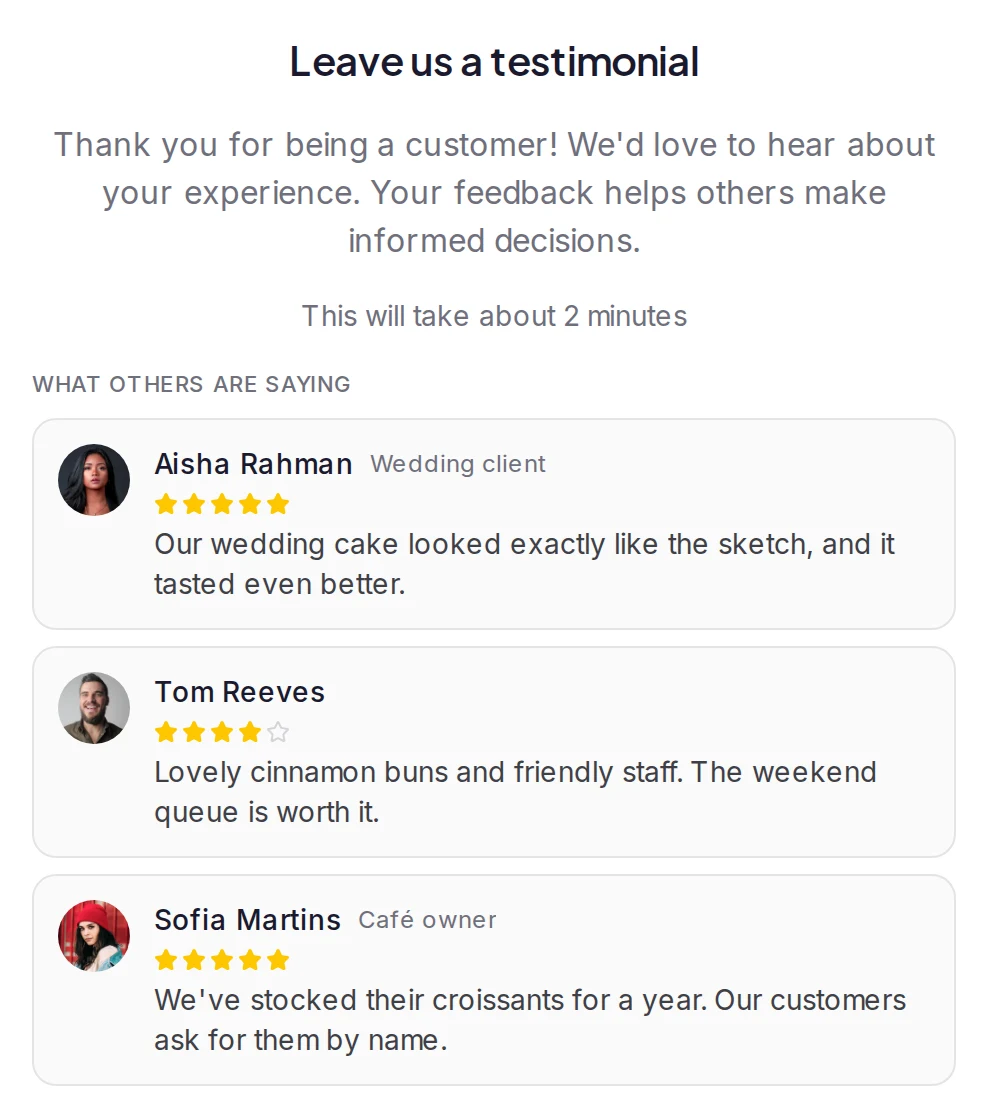
The first three appear straight away. Any others sit behind a button such as Show 2 more. Authors' email addresses are never shown.
Social proof appears only on the Welcome page, so the form needs one that's switched on. If your project has no approved testimonials yet, your form shows no list; the preview shows a note in its place.
What happens next
The builder saves your changes as you work, and your live form uses them straight away. As you approve new testimonials, they join the list on their own. If your plan changes to one without welcome videos, your form stops showing the video, but the one you saved stays on the page in the builder, and it's back on your form when you upgrade.
Was this page helpful?
Collect negative feedback privately
Ask customers who give a low rating what went wrong, get an email when they do, and read their answer in your inbox, where only your team sees it.
Set up your form's Thank You page
After a customer submits your form, show a message or a video, send them to your website, or ask for a review on Google and other sites.