Send invites from any app with a custom webhook
Post a customer's email from your own backend, Zapier, Make or n8n to a custom webhook, and ReTestimonial emails them a testimonial request.
A custom webhook lets any tool that can send an HTTP request ask your customers for a testimonial: your own backend, Zapier, Make, n8n or anything else. Your app sends one request per customer, with their email address, and ReTestimonial adds them to your invite emails. Smart Invites are on Premium and Business.
Every request that passes the webhook's checks is a real invite: it uses one invite and emails the address in it. A custom webhook has no filter until you add one, so any request with an email address invites that person.
Create a custom webhook
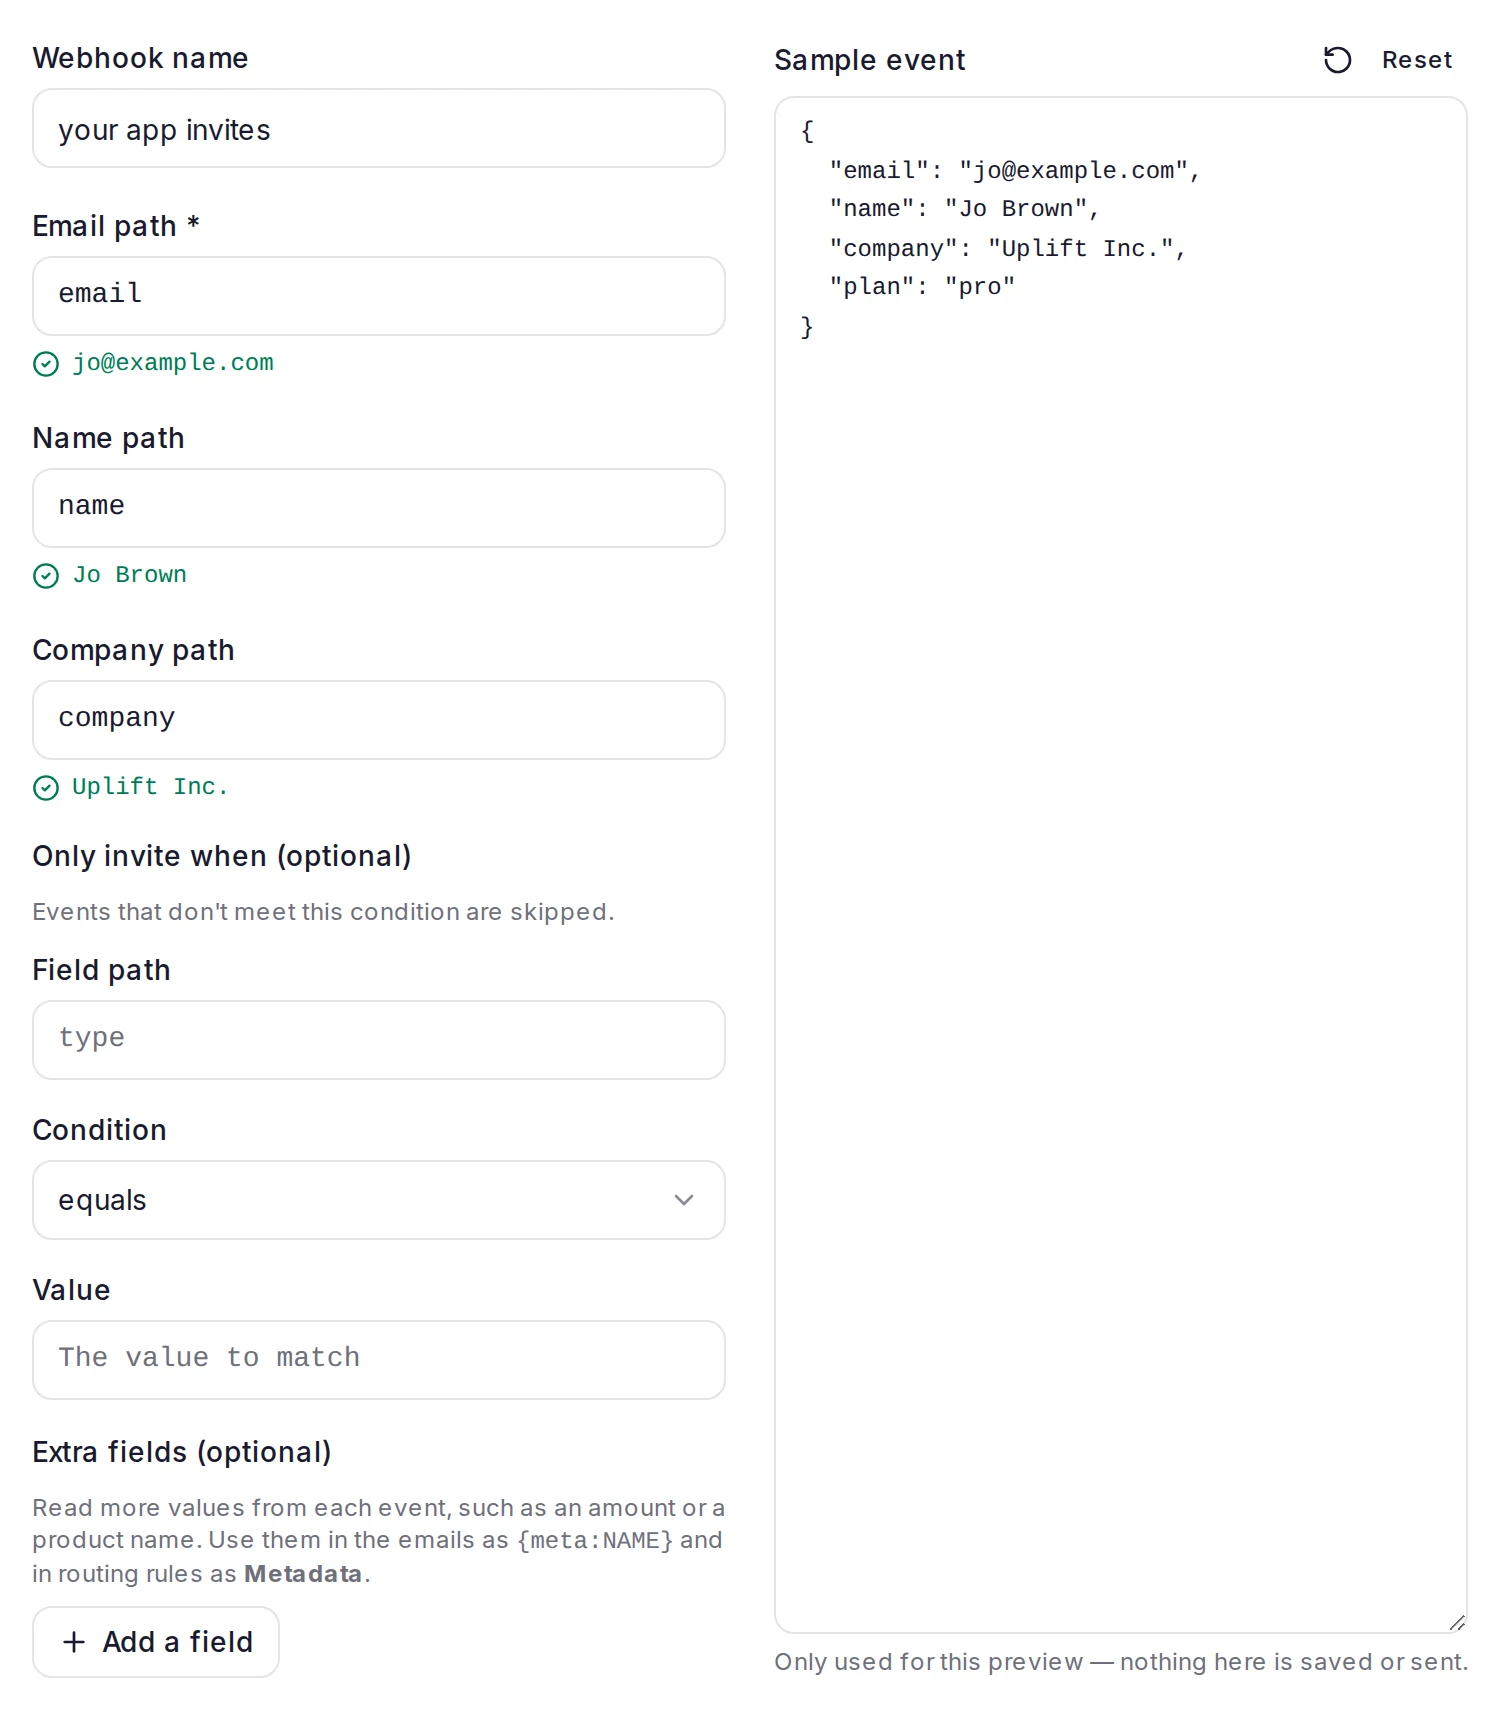
Follow Send invites automatically with a webhook. At Where do your customers buy?, choose Custom webhook under Something else. The paths start as email, name and company, so if your app sends those field names you don't need to change them.
When the webhook is created, click Copy next to Your webhook URL. You'll paste it into your app.
Send a request from your app
Send a POST request to the webhook URL with the customer's details. Use your own email address for the first test, and see the request format below.
Check that it arrived
The page you created the webhook on shows Listening for the first event… until your request arrives, then Event received — it works, or why the event was skipped or failed. Later, the webhook's Activity tab lists its recent events.
The request
- Method:
POSTto the webhook URL. - Body: one JSON object per request, for one customer. Send
Content-Type: application/json. Form fields (application/x-www-form-urlencoded) work too. - Not accepted: a list of events, a bare value or an empty body. These get a
400and invite no one.
A minimal body:
{
  "email": "jo@example.com",
  "name": "Jo Brown",
  "company": "Uplift Inc."
}
The same request with curl:
curl -X POST "YOUR_WEBHOOK_URL" \
  -H "Content-Type: application/json" \
  -H "Idempotency-Key: order-1042" \
  -d '{"email": "jo@example.com", "name": "Jo Brown", "company": "Uplift Inc."}'
The Idempotency-Key header is optional; see Retries and duplicates.
Map your fields
Your body doesn't have to use our field names. When you create the webhook, or later in its Settings, point each field at the place it lives in your body:
- Email path is required. The address is lowercased and must look like an email address, or the event fails.
- Name path and Company path are optional.
A path follows nested fields with dots, such as customer.email, and [0] picks the first item of a list, as in contacts[0].email. For form fields, the path is the field name exactly as sent.
Fields you don't map can still decide who is invited. For example, with "plan": "pro" in the body, set Only invite when (optional) to the Field path plan, equals, Value pro. Values are compared as text; > and < compare them as numbers. On Business, Conditional routing can also send different customers to different forms.
To try a body without inviting anyone, paste it on the webhook's Test tab and click Run test. See Test a Smart Invites webhook.
Signing
A custom webhook has no signing secret, and no signature header is checked. The secret part at the end of the URL is what proves a request comes from you, so treat the URL like a password:
- Send it from your server or automation tool, never from a web page or app your customers can inspect.
- Keep it out of public code and logs.
A webhook's URL can't be changed. If it leaks, delete the webhook and create a new one; the old URL stops working at once.
Responses
The webhook answers every request with a status code and a JSON body.
| Status | Body | What it means |
|---|---|---|
200 | "status": "processed" and a contactId | The customer was added and their emails are scheduled. |
200 | "status": "skipped" and a reason | The request arrived fine, but nobody was invited. See the reasons below. |
200 | "status": "error" and an error | The request can't be used as sent, for example no email at the mapped path, an invalid address, no invites left, or a form that's paused or a draft. Sending it again won't help until you fix the cause. |
200 | "error": "Webhook is paused" | The webhook is paused. The request is discarded, and that customer isn't invited later. |
400 | "error": "Invalid JSON body" | The body isn't a single JSON object or form fields. |
401 | "error": "Unauthorized" | The URL is wrong. Copy it again from the webhook's Setup tab. |
404 | "error": "Not found" | No webhook has this URL, for example because it was deleted. |
429 | "error": "Rate limit exceeded" and retryAfter | More than 100 requests reached this webhook in a minute. Send again after retryAfter. |
500 | "status": "error" or "error": "Internal server error" | Something went wrong on our side. Send the same request again later. |
A skipped response names the reason:
Filter condition not matched: the body didn't meet Only invite when (optional).Email suppressed (…): the address is on your do-not-email list, for example after an unsubscribe or a bounce.Within N-day cooldown: someone with this address was invited in this project within the Re-invite cooldown (days), by any webhook, a file or by hand.Email blocked (bounced or complained): an email to this address bounced or was reported as spam, in any project, so ReTestimonial never emails it.Duplicate event (idempotency): an earlier request with the same body (and the sameIdempotency-Key, if you send one) already invited a customer.
Skipped requests use no invites, and neither do the errors above.
Retries and duplicates
ReTestimonial doesn't fetch anything or retry for you. If a request gets a 429 or a 500, or no answer at all, your app should send it again. Don't resend a 200 automatically: a processed one is done, and a skipped or error one gets the same answer until you fix its cause. Once you have, resend it (see below).
A request is a duplicate when its body is exactly the same as an earlier one to this webhook that invited a customer. With an Idempotency-Key (or X-Idempotency-Key) header, it's a duplicate only when both the key and the body match. So:
- Give each real event its own key, such as your order ID, and resend a retry with the same key and exactly the same body. A body with a new timestamp in it is a new event.
- Duplicates are recognized for at least 30 days after the first request.
- A request that was skipped or failed is processed again when you send it again. After you fix the cause, such as the Email path, resend it as it was; its line in Activity shows the new result.
The Re-invite cooldown (days) is a second safety net: even a request that isn't a duplicate doesn't invite the same address twice within it. At 0 there's no cooldown, so only duplicate detection stops a repeat.
Send from Zapier, Make or n8n
Each tool has a step that sends an HTTP request. Put your webhook URL in it and send the customer's details as JSON.
Zapier
Add an action with Webhooks by Zapier and pick POST as the Event. Set Payload Type to JSON, paste the webhook URL into URL, and add email, name and company in Data with values from earlier steps. If you leave Data blank, Zapier sends every field from the previous step instead, and your paths need to match those field names. An Idempotency-Key goes in Headers. See Zapier's guide, Send webhooks in Zaps.
Make
Add the HTTP app's Make a request module. Paste the webhook URL into URL, set Method to POST and Body content type to application/JSON, then fill in the body. An Idempotency-Key goes in Headers. See Make's HTTP app documentation.
n8n
Add an HTTP Request node. Set Method to POST, paste the webhook URL into URL, turn on Send Body, choose JSON as the Body Content Type and fill in the body. To add an Idempotency-Key, turn on Send Headers. See n8n's HTTP Request node documentation.
Next steps
Was this page helpful?
Send invites automatically from Paddle
Connect Paddle Billing to Smart Invites so new Paddle customers get an email asking them for a testimonial.
Test a Smart Invites webhook
Dry-run an event on a Smart Invites webhook's Test tab to see who it would invite and why, without saving anything or sending an email.