Send invites automatically with a webhook
Connect your store or app with a webhook so each new customer gets a testimonial request by email, and see how many webhooks your plan allows.
A webhook asks each new customer for a testimonial automatically. You create it in ReTestimonial and paste its URL into your store or app; from then on, every purchase event it sends adds that customer to your invite emails. Smart Invites are on Premium and Business, and you need to own the workspace or be an Admin on the project.
Start a new webhook
In your project's sidebar, open Invites under Collect, go to the Webhooks tab and click New webhook. You can also click Connect a webhook on the Overview tab.
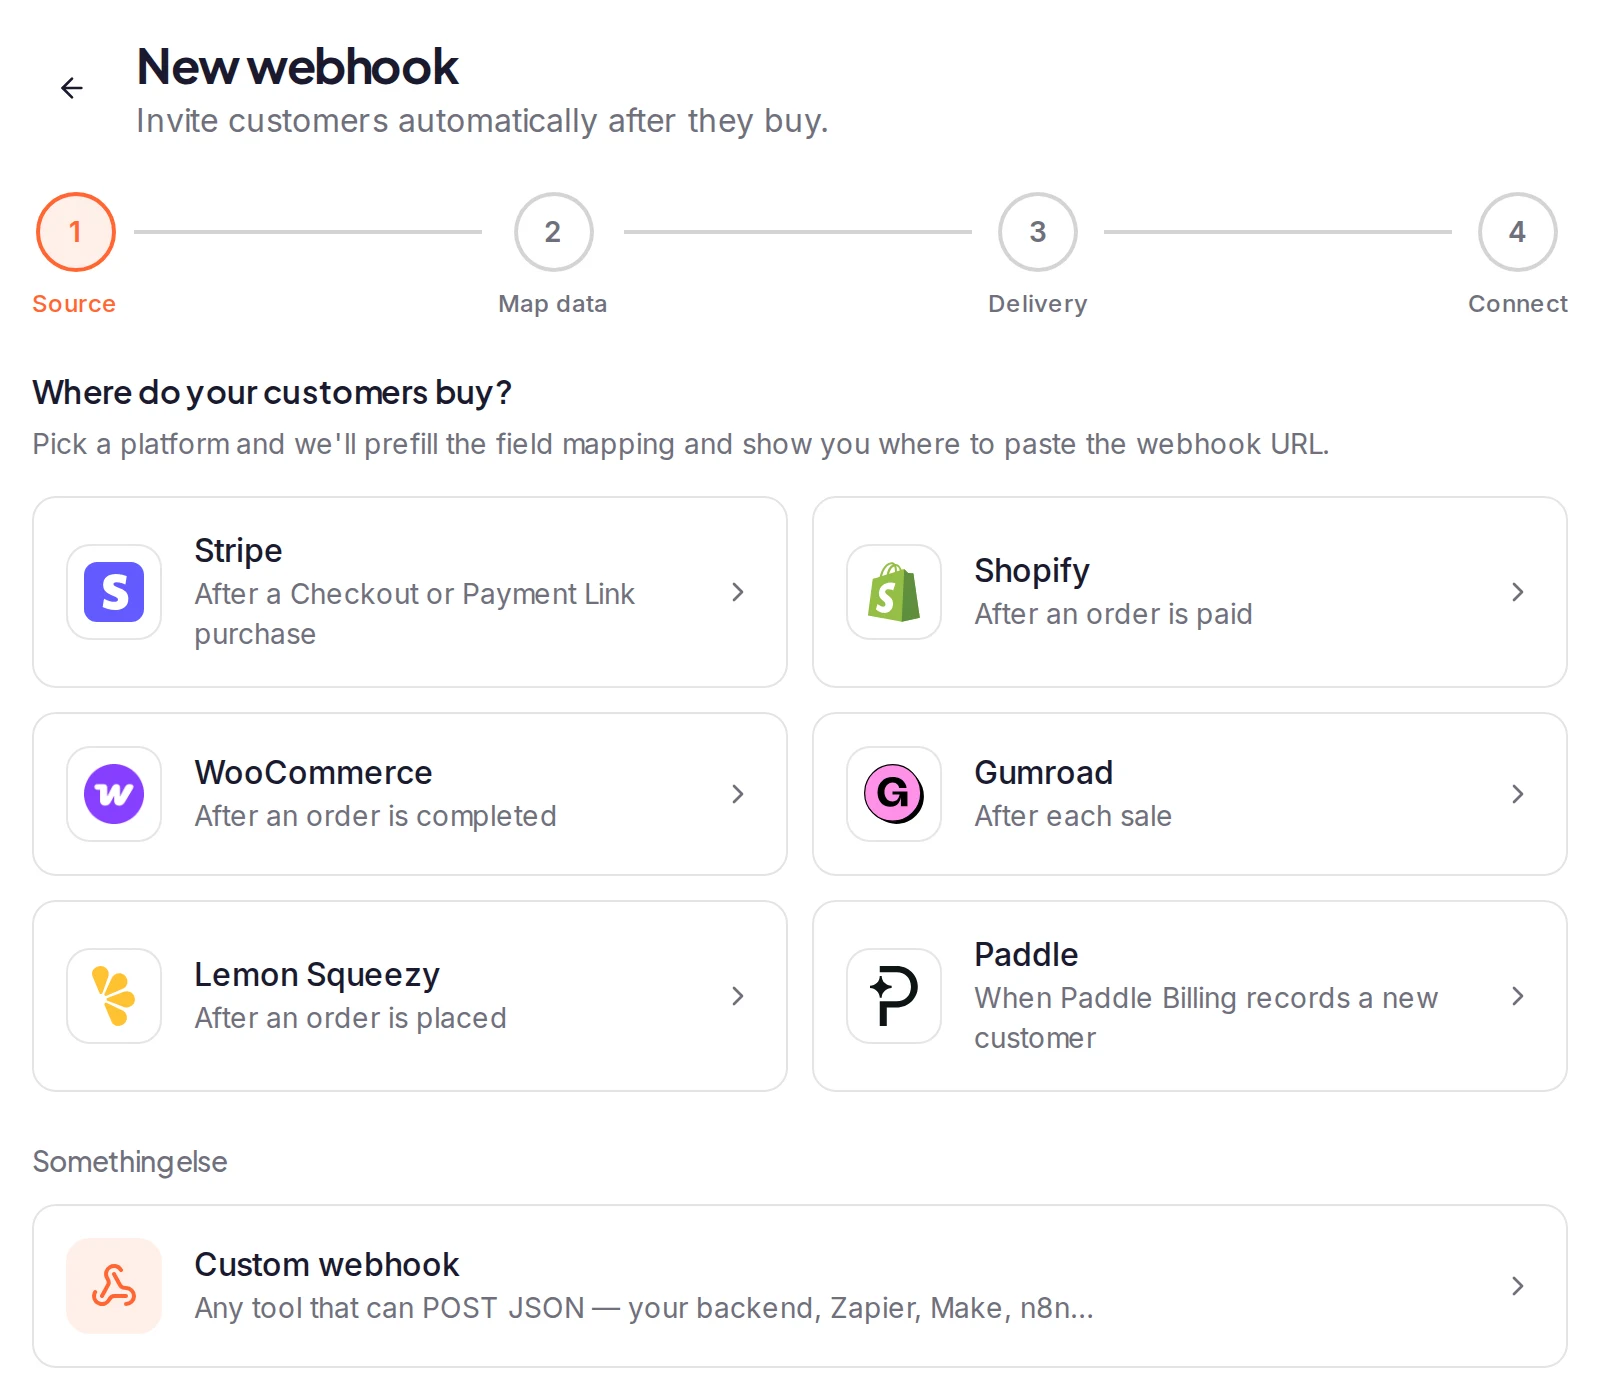
Choose where your customers buy
Under Where do your customers buy?, pick Stripe, Shopify, WooCommerce, Gumroad, Lemon Squeezy or Paddle. The next steps come filled in for that platform. For any other tool that can send JSON, such as your own backend, Zapier, Make or n8n, choose Custom webhook under Something else.
Tell us where the customer's email is
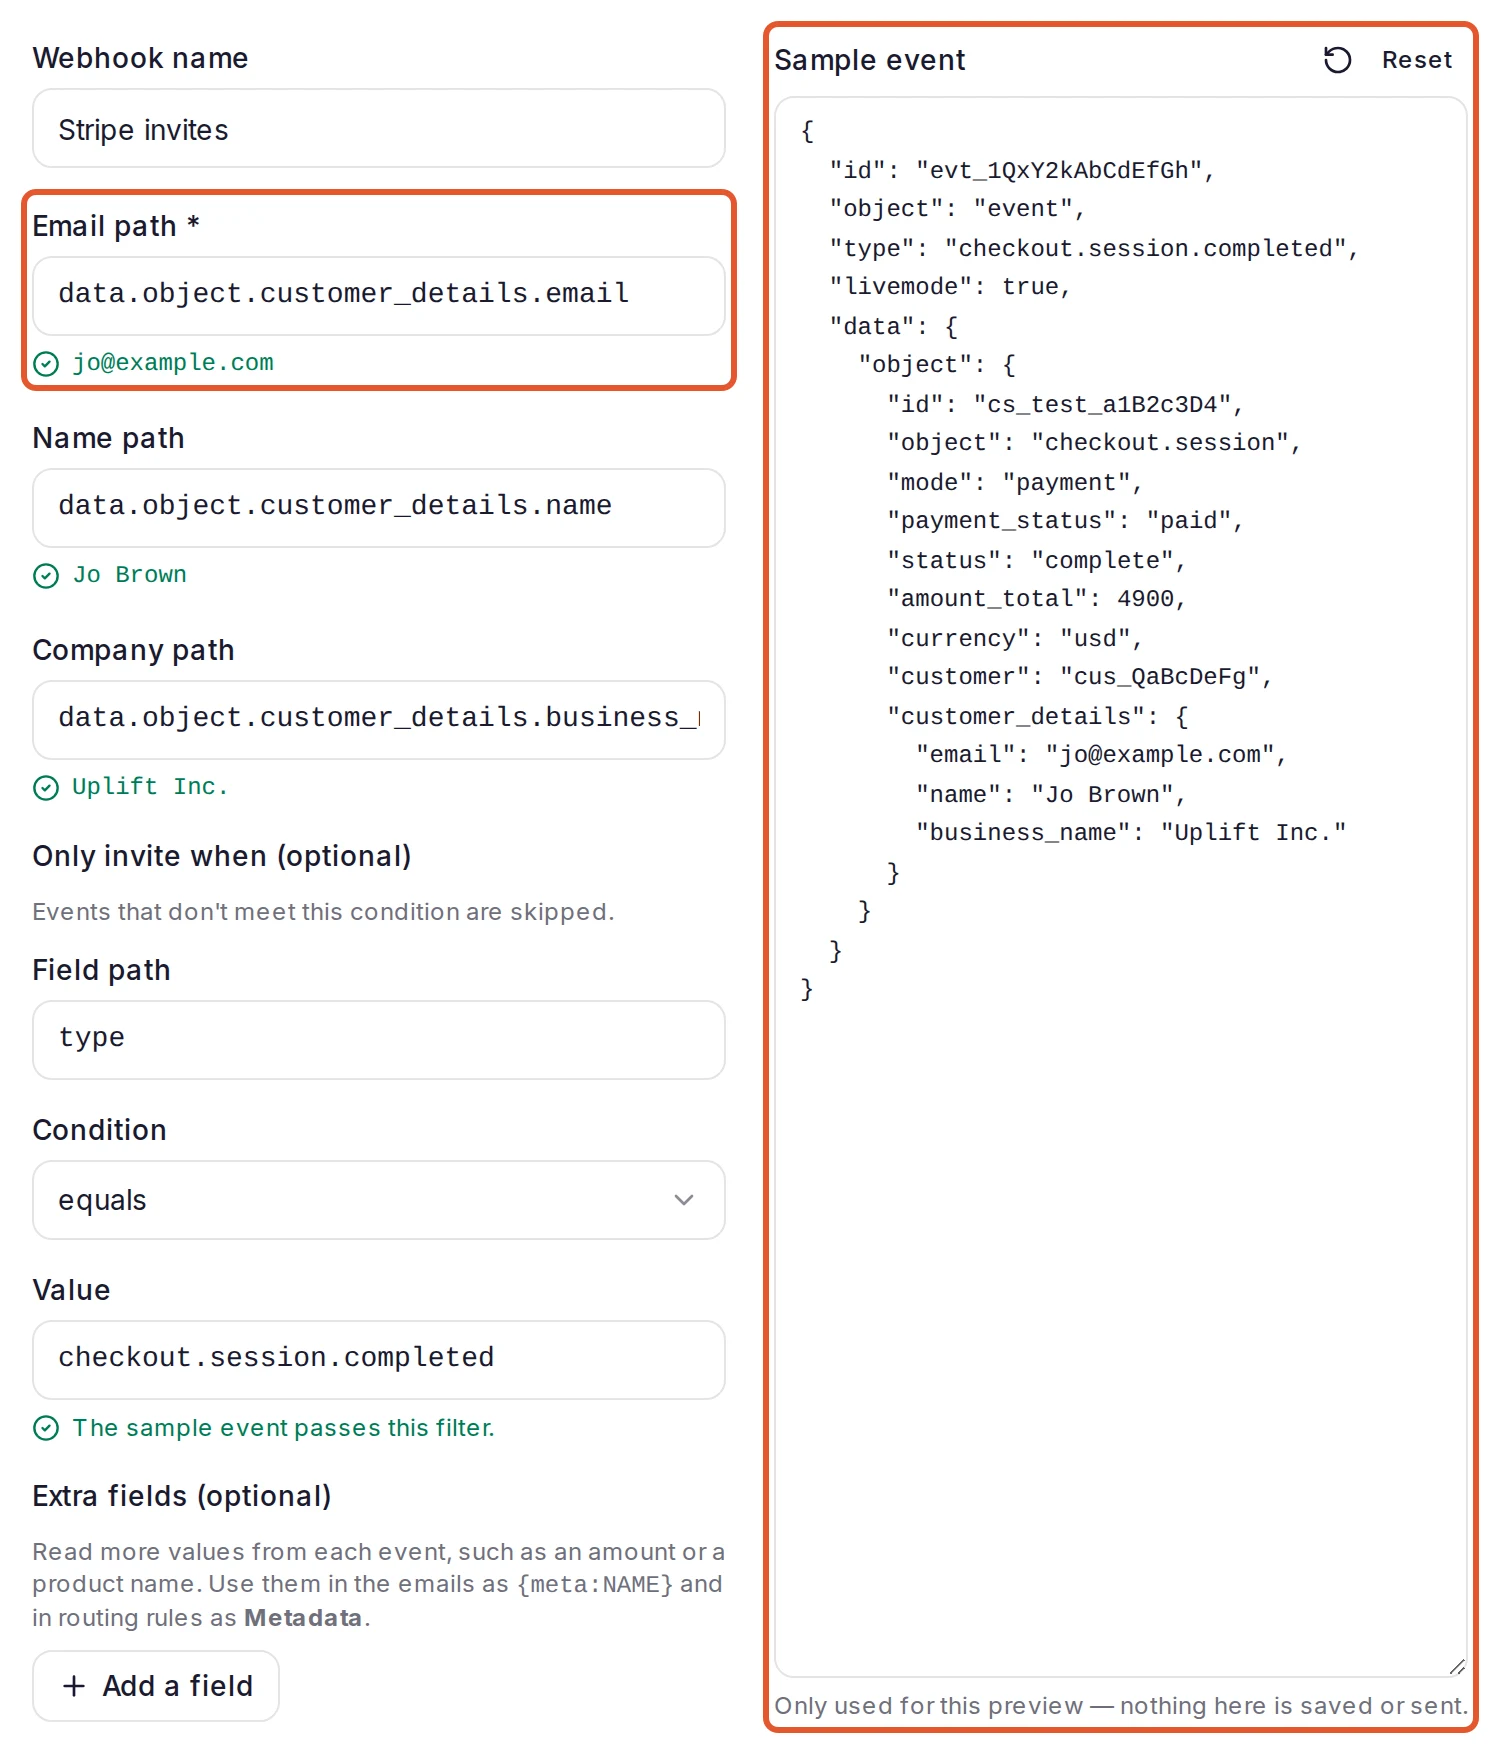
Give the webhook a Webhook name you'll recognize. Then check the paths that point to the customer's details in each event:
- Email path is required. Without it, nobody can be invited.
- Name path and Company path are optional.
A path follows the event's fields with dots, such as data.object.customer_details.email, and [0] picks the first item of a list, as in line_items[0].name. The Sample event box shows a typical event from your platform. Paste one of your own events there to check the paths: under each one you'll see the value it finds, or Not found in the sample payload. The sample is only used for this check. Reset brings back the original.
The same screen has two optional parts, each with its own section below: Only invite when (optional), to invite only some customers, and Extra fields (optional), to read more from each event.
Click Continue.
Choose the form, the emails and the timing
- Form: the collection form the emails link to. A paused or draft form is listed but can't be chosen, because its link wouldn't open; if the form is paused later, events fail with "The webhook's form is paused or a draft" without using an invite. If the project has no forms yet, click Create a form, then I've created one when it's done.
- Email sequence: Project default template, or one of your own templates. It holds the first email and any reminders.
- Wait before the first email: in minutes, hours or days, up to 30 days. At 0, the first email is scheduled as soon as the event arrives.
- Re-invite cooldown (days): 90 unless you change it. Anyone invited in this project within that many days, whether by a webhook, a file or by hand, isn't invited again. 0 turns it off.
To send different customers to different forms, open Conditional routing: see Send customers to different forms.
Click Create webhook.
Connect your platform
The webhook is live as soon as it's created, and nothing is sent until an event arrives. Click Copy next to Your webhook URL and add the URL in your platform, following the steps on the page. Treat this URL like a password: anyone who has it can add contacts to your project.
For Stripe, Shopify, WooCommerce, Lemon Squeezy and Paddle, paste the platform's signing secret into the field marked (recommended) and click Save. With it set, only events genuinely signed by your platform are accepted. A saved secret can't be viewed again, only replaced.
The page shows Listening for the first event… until your platform sends one, then Event received — it works or why the event was skipped or failed. You can leave at any time; Open webhook takes you to the webhook's page.
To check the webhook before a real customer buys, see Test a Smart Invites webhook.
Step-by-step guides for each platform: Stripe, Shopify, WooCommerce, Gumroad, Lemon Squeezy, Paddle and any other app.
Invite only some customers
To invite only some customers, fill in Only invite when (optional): a Field path, a Condition (equals, not equals, contains, exists, or a comparison such as >) and a Value. Events that don't meet it are skipped. Most platforms come with this filter already set, so that only the right event invites anyone.
You can set it when you create the webhook, or later in the webhook's Settings.
Read more from each event
To use more of the event, such as the amount paid or the product name, click Add a field under Extra fields (optional). Give it a Name (letters, numbers and _) and a Field path. The emails can then show it as {meta:Name}, for example {meta:amount}, and a routing rule can check it with Source set to Metadata Key (Metadata in Settings). Each field needs a field path (up to 200 characters) and a name no other field uses; names such as constructor or toString aren't accepted. Until every field is valid, you can't go on or save. A webhook can have up to 10 extra fields.
You can add them when you create the webhook, or later in the webhook's Settings.
Send customers to different forms
On Business, Conditional routing sends different customers to different forms. Open it, click Add Routing Rule, give the rule a Label, leave Source on JSON Path, and enter the Field, Operator and Value to compare. Then choose the Target Form (a paused or draft form is listed but can't be chosen) and, if you like, an Email Template. Rules are checked in order and the first match wins; use the arrows to reorder them. Customers who match no rule get the Default form. A webhook can have up to 5 rules.
Conditional routing is on the screen where you choose the form, and later in the webhook's Settings.
Read the webhook's activity
The webhook's page counts the events it has Received, and how many Invited someone, were Skipped or Failed. Its Activity tab lists the Recent events, up to the last 50, each labelled Invited, Skipped or Failed; a skipped or failed event shows its reason.
For what each reason means and how to fix it, or if no event is listed at all, see Smart Invites webhook not inviting customers.
Limits
- Webhooks per project: 1 on Premium and 3 on Business. Paused webhooks count too; delete one to make room. At the limit, New webhook is switched off; delete a webhook to add another.
- Invites: each customer the webhook invites uses one invite, from the project's monthly allowance first and then from purchased invitation credits. Reminders don't use more, and skipped events use none.
- One event per request: a single JSON object, or form fields as Gumroad sends them. A list of events is rejected.
- Repeats: if your platform sends the same event twice, the customer is invited once.
What happens next
Invited customers are grouped in a campaign on the Campaigns tab, named after the webhook and ending in "— Auto". The first email goes out after your wait, and the reminders follow your email sequence. The emails stop when the customer submits a testimonial through the link, unsubscribes, or an email to them bounces.
Was this page helpful?
Invite customers from a file
Upload a CSV file of customers to send each of them your Smart Invites emails, and see who was left out of the import and why.
Send invites automatically from Stripe
Ask every customer who pays through Stripe Checkout or a Payment Link for a testimonial, with a Smart Invites webhook.